An official website of the United States government
 ) or https:// means you've safely connected to the .mil website. Share sensitive information only on official, secure websites.


The Anatomical Collections of the National Museum of Health and Medicine has over 6,500 human and comparative specimens in its inventory of wet tissue specimens, dating as far back as the 1860s that document the effects of trauma and disease on the human body. Conservation is performed routinely for the restoration and preservation of all wet tissue specimens in the collections. Conservation prevents decay and loss of tissue integrity, allowing the life of the specimen to be extended for observation and study.
Wet tissue specimen conservation involves the monthly inspection of specimens for changes in fluid levels and conditions as well as damage. During this process, a before and after image of the specimen is recorded. Also, the museum produces a condition report which includes the current overall condition of the specimen, and lists the repairs made to restore and preserve the specimen for display.
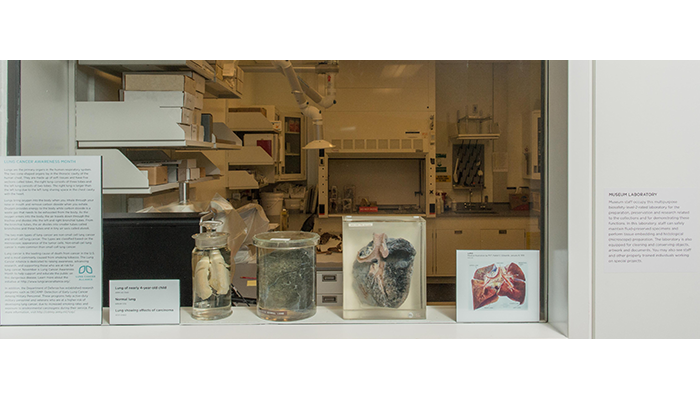
View of a temporary "In the Lab" exhibit on the lungs, featuring specimens from the Anatomical Collections, and images from the Otis Historical Archives, at the National Museum of Health and Medicine. November 2015. (151106-D-MP902-002: NMHM photo)
NMHM has a specific lab space that is designated for the conservation of wet tissue specimens, and safety protocols are practiced on all occasions for the handling of hazardous materials along with the use of personal protective equipment for staff. While all anatomical personnel on staff are qualified for wet tissue conservation, the histotechnician is regularly designated with the responsibility using a five-step approach.
Step 1: Draining the Fluids
Specimens are housed in two types of containers: glass and acrylic. Drainage may include siphoning for the acrylic containers, and a simple "pour off" technique for glass containers after the lids are removed.
The removal of a silicone-sealed lid is performed with a scalpel by carefully shaving the silicone until the lid is easily released. For the acrylic containers, a quarter-inch hole is drilled at the top of the container for siphoning.
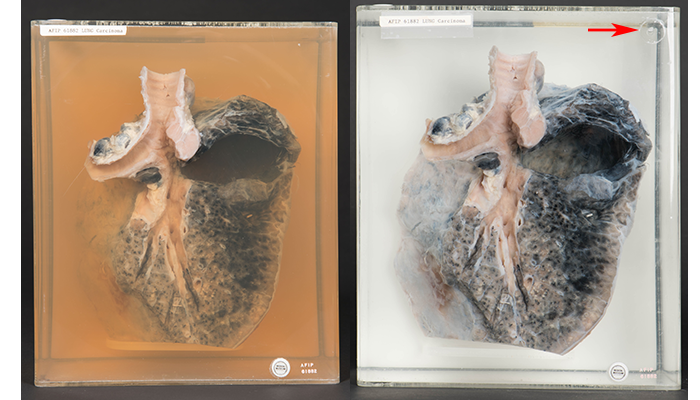
This is a lung with carcinoma from our Anatomical Collections in an acrylic container before (left) and after (right) wet tissue specimen conservation. In the top right corner of the acrylic container after conservation, there is evidence of a prior hole for siphoning. (150901-D-MP902-002, 150909-D-MP902-009: NMHM photos)
Step 2: Cleaning the Interior of the Specimen Container
In glass containers, where the lid and specimen can be completely removed, the interior is cleaned with mild detergents. When the specimen cannot be removed from the glass container, the interior is cleaned without agitation. The acrylic containers are sealed and only opened when rehousing the specimen, so they are cleaned by adding a mild detergent through a siphon and rinsing with water until clean.

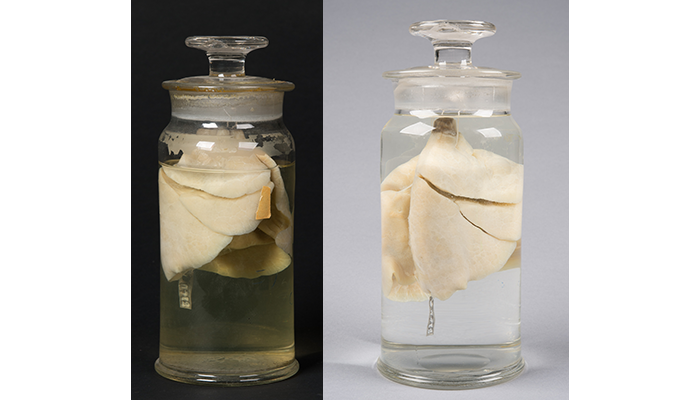
This is a normal lung before (left) and after (right) wet tissue specimen conservation. (150901-D-MP902-006, 150909-D-MP902-002: NMHM photos)
Step 3: Cleaning the Exterior of the Specimen Container
Cleaning the exterior is done with the use of a mild detergent and rinsing the exterior with water. After the container is dried, the surface is polished to remain clean, remove scratches, and protect the surface.
Step 4: Refilling the Container
After cleaning, each container is refilled with a 10% formalin fixative solution; this fixative preserves the specimen's integrity and prevents decay. The containers with removable lids are filled by very carefully pouring the formalin into the container to prevent disturbing the specimen. The siphoning hole is used to fill the containers that had entry holes drilled for fluid removal. For specimens enclosed in glass, the specimen is returned to the container. The acrylic-enclosed specimen is not removed from the container and remains in the container during the process.
This is a child's lung from the museum's Anatomical Collections before (left) and after (right) wet tissue specimen conservation. (150901-D-MP902-004, 151030-D-MP902-002: NMHM photos)
Step 5: Resealing the Container
After each specimen container is filled with the formalin fixative, it is observed for a minimum of one day to rule out the leaking of lipids (fats) or blood into the container prior to sealing. If there is leakage, the specimen is set aside until the leakage stops, as it can be harmful to the specimen. Glass containers are sealed with a screw-on lid or silicone-sealed lid. Acrylic containers are sealed with an acrylic "button" (an acrylic circular disk approximately one-half inch in diameter) by using a liquid solvent to "glue" the button to the container opening. Each specimen is checked to rule out leakage from the seals prior to returning to storage or display.
Specimen conservation is essential to preserving the specimen for extended periods of time; some specimens in the museum's collections have been preserved since the museum opened in 1862. By doing so, the museum maintains the specimen for historical reference and research purposes.
Resources
Relevant Links:
Storage Concerns for Fluid-Preserved Collections